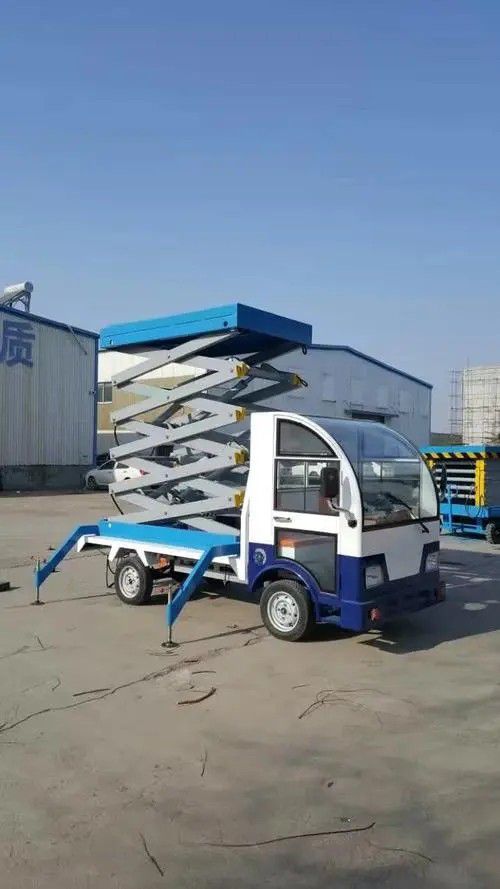
KosarinAluminum alloy hydraulic lifting platformCommon sense that management knows is very helpful
2024-02-27 02:33:36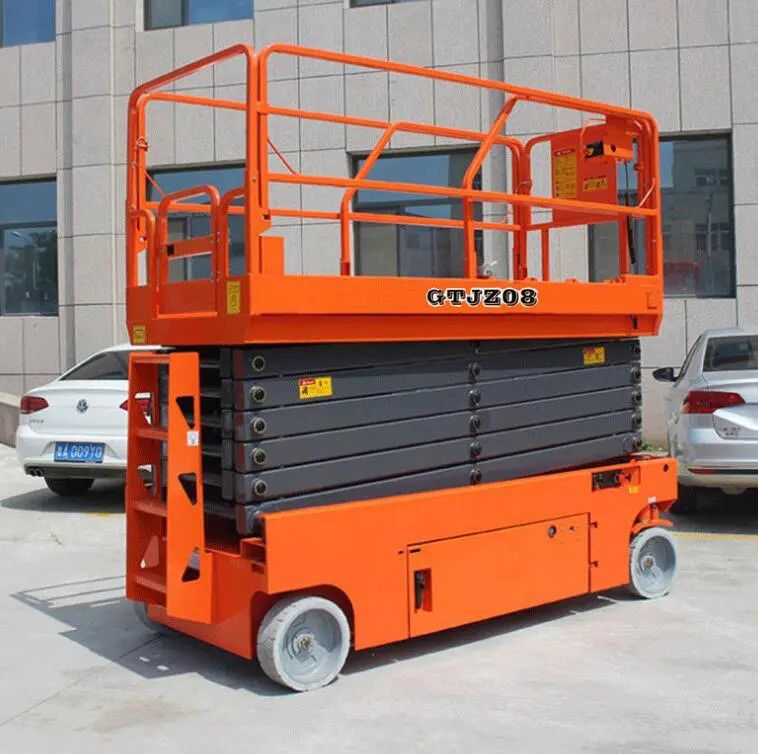
Regularly check all wires and cables for damage. Timely bandage and replace damaged parts.Applicable environment: Indoor or outdoor Applicable temperature: Safety device Safety rocker: When the equipment is running and rising, the rocker will automatically prevent wheelchair platform.Weekly maintenance: According to the operation instructions, ensure that the elevator is inspected and smooth every dayThe cheapest,After cleaning, clean the filter and replace it with a new filter element before adding new oil. What adverse reactions may occur during the early use of hydraulic cargo elevators?When disassembling the hydraulic oil tank filler cap, inspection hole, hydraulic oil pipe and other parts, it is necessary to avoid dust during the system oil passage. The disassembled parts must be thoroughly cleaned before opening. When disassembling the hydraulic oil tank filler cap, first remove the soil around the tank cap. After loosening the tank cap, remove any remaining debris from the joint area (do not rinse with water to prevent water from seeping into the tank). Only after confirming cleanliness can the tank cap be opened. When using materials and hammers,KosarinMovable scissor type lifting platform, materials that do not remove fiber impurities and specialized hammers with rubber attached to the surface should be selected. Hydraulic components and hydraulic hoses should be carefully cleaned, and then assembled. Choose a well packaged filter element (the inner packaging is damaged, although the filter element is intact, it may also be unclean). When changing the oil, clean the filter at the same time. Before installing the filter element, carefully clean the bottom dirt inside the filter housing with materials.When loosening occurs, newly processed and assembled components have deviations in geometric shape and fitting dimensions. In the early stages of use due to alternating loads such as impact and vibration, as well as factors such as heat and deformation, coupled with rapid wear and tear, it is easy to cause the previously fastened components to loosen.
Organize, remove rust and repaint the structural components such as the suspension cage and guide rail frame for corrosion, and reinforce the severely corroded load-bearing membersFor more, please check, after installing hydraulic cargo elevators in factories, floors, docks, and other places, there may be some adverse reactions and problems in the early stage. Below, Yakali's editor summarizes some common problems with hydraulic cargo elevators and provides some statements on how to solve and prevent these problems.The arrangement of vibration points should be based on the vibration aging process standard GB/T-. The vibration aging exciter should be placed at a position with high rigidity and amplitude of the workpiece, and its rotating axis should be parallel to the plane where the effective zone of the vibration mode is located. The exciter should be fixed at the end angle or edge of the workpiece with high rigidity, so that small energy can be used to excite the component with large amplitude. Based on the structural shape of the foundation, we set the vibration points on the protruding plates on each side of the workpiece.Regularly check all wires and cables for damage. Timely bandage and replace damaged parts.Kosarin,Check the smooth steel wire rope and various fasteners, it is necessary to replace themCheck the safety interlocking equipment of the first cut door of the hanging cageThe frequency conversion system circuit of the construction elevator is mainly composed of two parts: the main circuit and the circuit. The main circuit is mainly composed of a construction lifting cargo elevator (hereinafter referred to as the lifting cargo elevator) driven by a more complex rectifier. Before installation, all the eccentric roller shafts of the lifting cage and driving mechanism are loosened or adjusted to a large eccentricity. The lifting cage and driving mechanism are installed in the guide rail frame respectively, and the two are connected. Starting from adjusting the driving mechanism, power on the suspension cage to lift it m above the ground or detach it from the ground buffer spring (or support). The adjustment and sequence are as follows: . Use a special wrench to rotate the lower double (single) pendulum eccentric shaft to adjust the eccentricity to ensure that the installation plate surface of the driving mechanism is perpendicular to the horizontal plane, and ensure that the upper and lower pendulum wheels evenly guide the rails at the same time. Use your hand to move each wheel body and check if it evenly presses the rails; . Use a special wrench to rotate the eccentric shaft of the gear rack back pressure wheel to adjust the side clearance during gear rack meshing. When adjusting, use a feeler gauge to measure the side clearance to .; Between .mm, each pressing wheel should evenly press on the back of the rack. Move each wheel body by hand to check if it evenly presses against the tooth back. Similarly, adjust the guide rollers on both sides of the guide rail. The adjustment key is to adjust the guide wheel on one side of the guide rail to lightly press it onto the guide rail. When moving the wheel body by hand, it should be possible to rotate but there should be obvious obstruction; The roller on the other side should maintain a clearance of .-. ram with the guide rail; . Adjust the lifting cage according to the above and sequence. If the driving mechanism and the lifting cage are integrated into the lifting cargo elevator, the lifting cage should be adjusted according to the and sequence of adjusting the driving mechanism. Conduct a visual inspection of the operation of each roller and use the lead pressing method and coloring method to check the meshing of the gear pair; Fine tune pairs of unsatisfactory parts. The key point is to carefully adjust the meshing status of the gear pair: when the spots shown in appear on the surface of the gear rack, it indicates that the driving mechanism is tilted towards the side of the guide rail. At this time, the lower swing wheel (single or double wheel) should be adjusted to move the lower part of the driving mechanism towards the direction of the guide rail until the area of the spots reaches more than % of the surface of the gear rack. The smaller the area, the easier it is to damage the gears and racks.